

Mountain Photography: Take Serene Photos of Rugged Landscapes
How do you capture a mountain and convey its awesome presence inside your tiny camera lens? It’s a challenge, but not an insurmountable one.


It’s no surprise that as an aspiring landscape photographer, you’d want to capture an awe-inspiring mountainous range, but this kind of nature photography has its challenges. It’s hard to replicate what you can see with the naked eye, and without the proper techniques, your mountain photography attempt may produce images where the beautiful mountain peaks seem unjustly small and modest.
There are just a couple of photography tips—and upgrades to your equipment—that you need to be aware of to elevate your mountain photography.
Essential Gear For Mountain Photography
Most cameras will let you shoot RAW photos, which is particularly important for getting the most out of the images during editing. But there’s only so much you can do in post-production. Adding a couple of things to your camera bag will help you improve the quality of your mountain photography from the moment you press the button.
You’ll Need Special Lenses
Since most cameras will take high-resolution images, the lenses will actually do the hard work for you. Carrying a couple of options means you’ll be able to capture an array of landscape images:
- Take a wide-angle lens for large photos that reflect the scale of the mountain range
- Take a telephoto lens to zoom in and capture some of the details of a peak
A filter is also essential for any mountain photography shoot. Whether you prefer a neutral density (ND) filter or a polarizing one, these will shield the camera from too much light and stop the image from being over-exposed.
Don’t Miss Mobile Photography Opportunities
You may not always have your proper camera on you, so mastering mobile photography means you can capture scenes whose beauty you may not have anticipated.
The best thing about outdoor photography with a smartphone is that most modern cameras already have built-in wide-angle and telephoto lenses, so you’re always ready to shoot. If yours doesn’t have these lenses, you can buy external ones to clip on.
Show A New Perspective With Aerial Photography
Not many people will get the opportunity to soar over mountain vistas to see the true scale of it, which is why aerial mountain photography is so exciting. Perhaps the easiest way to shoot from an aerial perspective is to fly a camera drone. With the proper settings, it’s possible to take professional drone photos; just make sure you’re taking pictures in RAW format, and double-check the exposure to avoid blown-out images. While there are a lot of things you can fix in Lightroom, over-exposure is difficult to correct in post-processing.
If you don’t have a drone, try raising your camera on an extended tripod. Other tricks, like climbing up ladders or shooting from the tops of buildings, are less accessible for mountain photography.
Use A Tripod For Crisp Images
You won’t have to worry about your shutter speed during your mountain photography shoots, but moving the camera can cause blurred images. The best way to ensure your mountain scenes stay sharp is to secure the camera on a sturdy tripod and limit movement.
Find Different Photography Spots For Unique Pictures
No matter how talented you are, your images will look the same as everyone else’s if you only stick to popular national parks and or well-known mountain ranges like the Maroon Bells of Colorado or Dolomites of Italy. One of the easiest ways to stand out is to head off the beaten path where the wildflowers grow, and scout for unique photography locations.
There are a few tools that will help you figure out where to head to escape the crowds of hikers and other aspiring landscape photographers and capture more exclusive compositions:
- Google Earth will give you an aerial view of the area you’re scouting and let you preview your mountain composition as if you were standing there. You can browse online, but the desktop app is more powerful as you can see how the sun illuminates the peaks and reposition yourself to plan the best angle.
- A topographic map app, like GAIA GPS or similar, lets you plot out the route you’ll hike for your mountain photography shoot—but make sure you know how to read topographic maps first!
Something to protect your gear
You may have to hike a fair distance to find a less crowded spot and get that unique angle. This means you must have a way of transporting your camera and accessories efficiently—like a camera backpack—and keeping everything safe from the elements. Make sure you can keep everything dry, and don’t let it get too cold if you decide that mountain photography is best done in the winter.
Use The Right Mountain Photography Camera Settings
Sometimes it’s the tiniest of adjustments that can take a photo from uninspiring to exceptional. Make sure to use the following camera settings for wall-art worthy, high-quality mountain photos:
- Choose aperture priority mode
- Set your ISO as low as possible
- Use a single focus point, which should be the center of the mountain
Some experienced mountain photographers advise that you take three versions of the image at different exposures and blend them when editing. Known as bracketing, this technique creates a vibrant photo that shows details in the highlights and shadows and reduces the risk of walking away with incorrectly exposed, unusable images.
Ideas To Start Your Mountain Photography Ascent
With such a commanding subject, you don’t have to work too hard to ensure the mountain remains the focus of your landscape photos. This allows you to try out lots of different styles and techniques.
Atmospheric Black and White Mountains
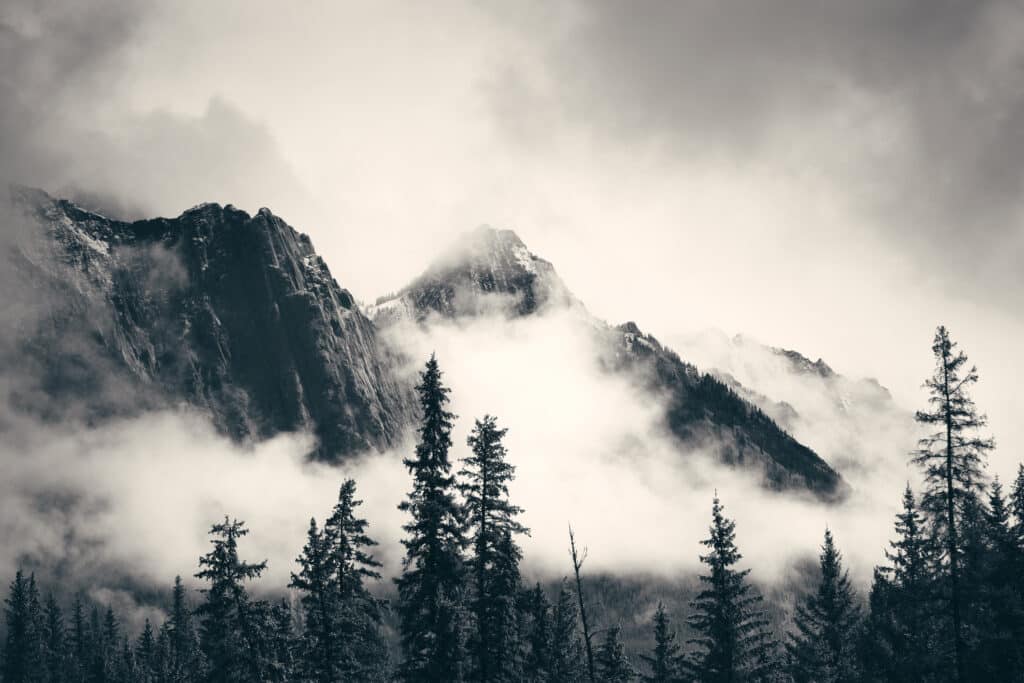
You can capture the drama of a mountain range when you go for a black-and-white image. Since mountain landscape photography is all about contrast, you want to ensure you shoot a scene with conflicting shapes, textures and colors. For the best black and white mountain photography composition, try to get above the cloud line and shoot the tips peaking out above it, or focus on the snow-capped peak of a giant surrounded by its smaller siblings.
Stunning Snowy Mountains
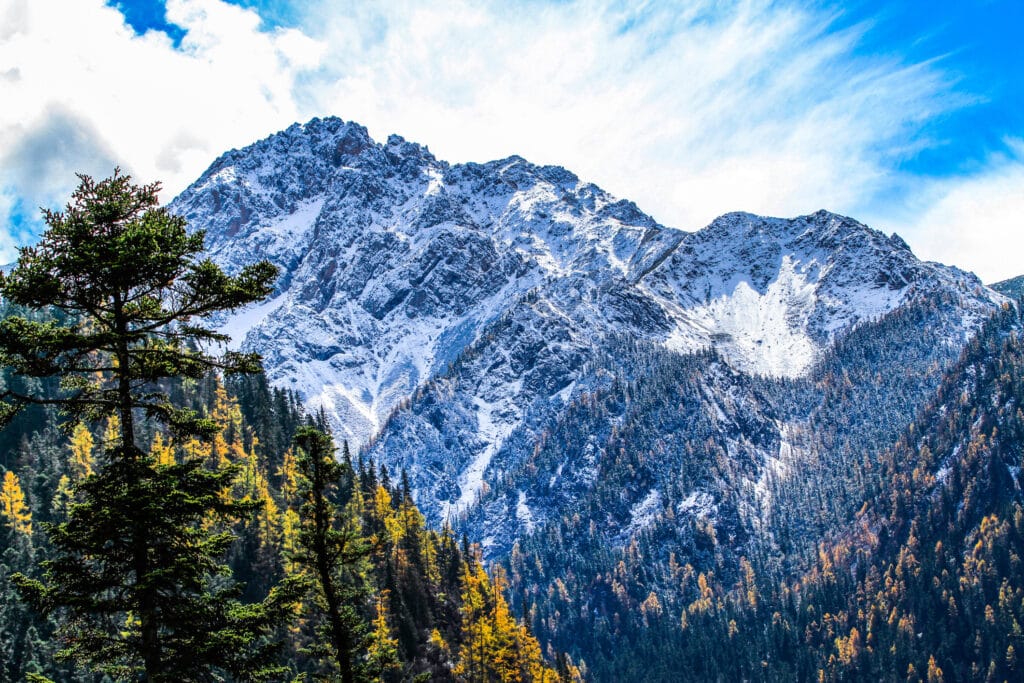
One of the best things about snowy mountain pictures is that the white tips mean the image will look bright, regardless of how dull the light is. That means you don’t have to worry about long exposures and shaky images. The trick is to keep your ISO low, make sure your white balance is correct, increase the exposure slightly to avoid greyish photos and use a polarizing filter to limit glare.
If you struggle to get crisp images, your camera might be unable to focus. If that’s the case, focus on an area of contrast—for example, a part of the mountain without snow—and try again.
Explore Photography with Skillshare
Browse More ClassesThe Art of Photography: Defining Your Visual Style
Fine Art Photography: Express Your Vision With In-Camera Effects
Fundamentals of Photography: Deepening your Practice with Essential Techniques
Golden Fall Forests Overshadowed By Peaks
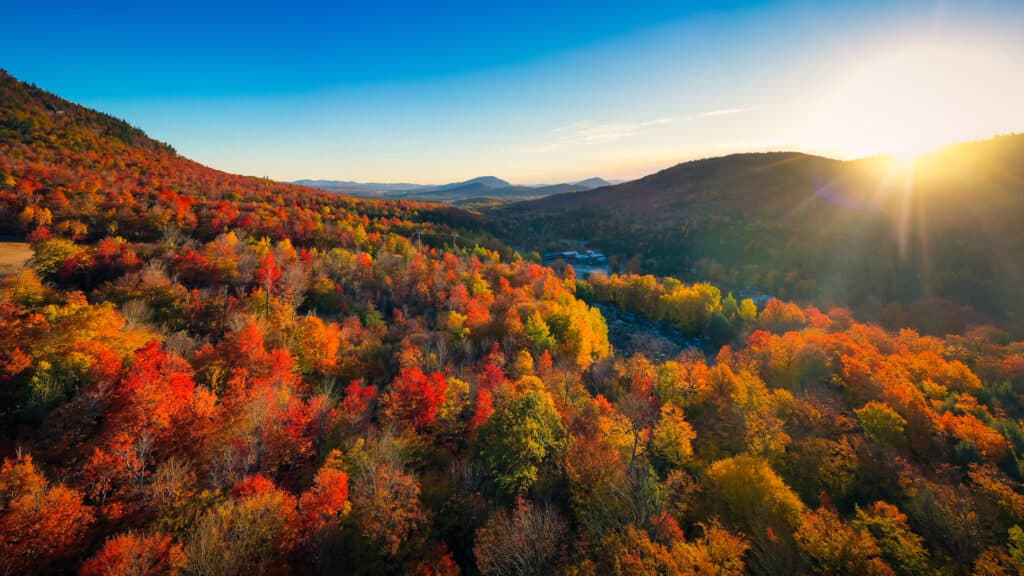
A quintessential fall landscape combines mountain and forest photography to capture the contrast of the warm, golden leaves against the cold, grey hillside. Make sure you use a circular polarizer filter and tripod, so you can slow down the shutter speed and make the oranges pop without adding any glare to your fall mountain photography.
Golden Mountains At Sunrise and Sunset
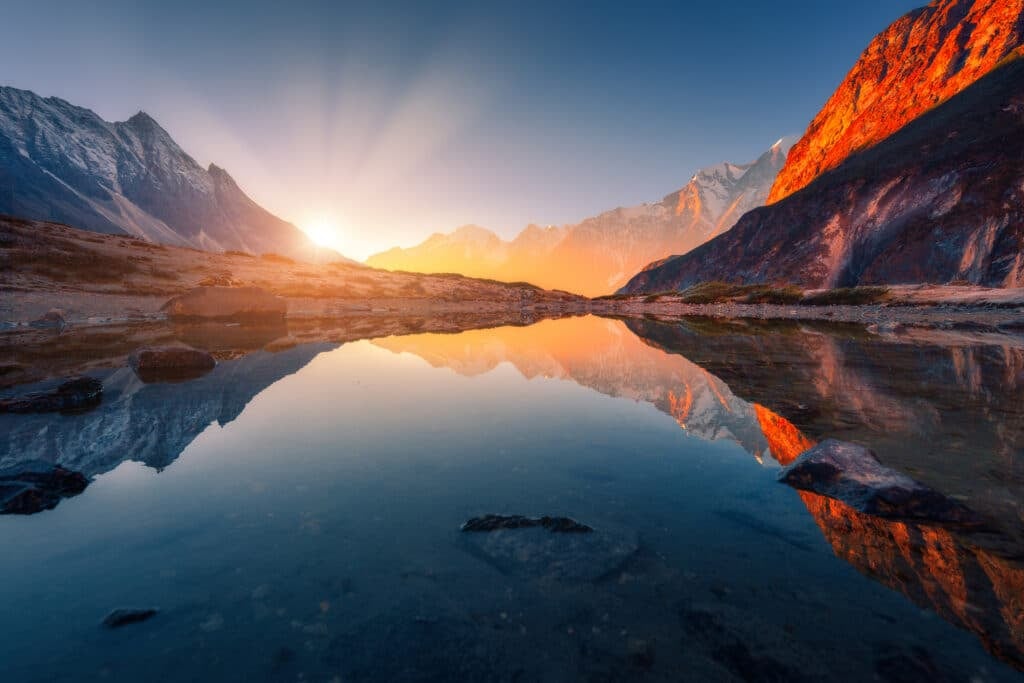
A cool nature photography technique for shooting the sunrise over a mountain is to soften the harsh light by obscuring it with an object. Try framing your shot so the rays are peeking out between the branches of a tree, for example, and you’ll get a more exciting impression of a mountain bathed in the sunrise glow. Make sure you also use a fast shutter speed to limit the light.
When it comes to sunset photography, you have the opposite challenge of waning light. The best way to capture the intensity of the colors is to use a slow shutter speed—but don’t forget the ND filter, or it can look over-exposed and blown out.
The Mounting Case For Mountain Photography
It may seem like a challenging discipline, but you may be surprised by how quickly your mountain photography improves. If you’re feeling overwhelmed by the idea of investing in new gear, you could always start with the default mountain setting on your camera, if it has one. If you enjoy it and have an eye for a good composition, why not explore whether you could spin up your own photography side hustle and recoup some of the money you spend on new gear?
Related Reading


Learn Photography with Skillshare — Start Your 7-Day Free Trial Now!
Start Your Free Trial Today!- Unlimited access to all classes
- Hands-on classes with pro photographers
- Learn offline with Skillshare's app


