

Beach Photography: It’s Not Just for Summer Days
Sparkling sand, crashing waves and sunsets like nowhere else. Learning to photograph the beach will let you enjoy that seaside splendor no matter where you are.


Professional photographers, hobbyists and everyone in between find themselves drawn to the beach, and for good reason: there’s no shortage of breathtaking scenery to photograph.
But many run into a problem—the photos don’t turn out quite as gorgeous as the real thing.
That’s because the fine art of beach photography requires a little more than setting your camera to auto and pressing the shutter release button.
If you love the beach and want to take photos that do it justice, there are tried and tested techniques you can follow. With the right tools, camera settings and lighting considerations, you’ll be on your way to taking stunning beach photos in no time.
What Is Beach Photography
Any photography done at the beach can be called beach photography. As a type of nature photography, it can focus on natural elements, such as the water, sand, sky or wildlife. But of course, people and pets also make great subjects. Part of the appeal of beach photography is that you can photograph virtually anything there and take advantage of one of nature’s most beautiful backdrops.
Beach Photography Equipment
Start with what you already have—with the right settings, even your mobile phone can take great beach photos. When you’re ready to upgrade to more professional gear, consider getting the following:
Camera
The best cameras for beach photography are full-frame DSLRs or mirrorless cameras. These guarantee high-resolution photographs and allow you to change lenses so you can choose the right focal length and aperture for the subject you want to capture.
If you’re hoping to take beach photos close to water, where the camera may be exposed to salt water and splashing, make sure it is weather-sealed. For underwater photography, look into waterproof compact/point-and-shoot cameras or an underwater housing for your DSLR or mirrorless camera.
Lenses
The right lens will depend on the subject you want to photograph at the beach. If you’re after landscape photos, a wide-angle lens with a focal length of 14-35mm will help you capture much of the scenery. For portraits, on the other hand, where the scenery isn’t the focus of the photo but acts more as a background, a focal length of 50-100mm will yield much better results.
You also need to decide whether you want to use a zoom or prime lens. Zoom lenses have a variable focal length, so they are much more versatile. You can quickly go from shooting landscapes to portraits, without switching lenses. Prime lenses have a fixed focal length, but they offer wider apertures, have a faster shutter speed and produce slightly sharper images.
Filters
One of the biggest challenges in beach photography is controlling the amount of light that reaches the lens. The bright sun—and its reflections in the sand and water—can cause blown-out highlights and uneven exposure.
To combat this, you can attach filters to your lens. The most useful filters for beach photography are:
UV Filter
This filters out UV light and reduces atmospheric haze, making your images more clear no matter what time of day you’re capturing beach scenes. It also protects your lens from dust, sand and scratches.
Neutral Density (ND) Filter
This reduces the amount of light that enters the lens, which is a must if you’re using a wide aperture or a slow shutter speed. You should also have a graduated ND filter, which darkens the top half of the image, but not the bottom. This is perfect for landscapes when you want to make sure the sky isn’t overexposed relative to the land.
Polarizing Filter
This blocks reflected light, so it can greatly reduce the reflections on non-metallic surfaces, such as water, sand and foliage. This results in deeper colors and better contrast.
Reflector
If you’re looking to take portrait photos at the beach, a reflector can be a useful addition to your toolkit. On a bright day, the sun can cast harsh shadows on your subject’s face. To avoid this, you can use a reflector to provide a softer, more even light source.
Tripod
A tripod is not always necessary for beach photography. In fact, most times you’ll probably want the flexibility and freedom to move around while you’re taking photos. But there are a few instances where a tripod can come in handy. For example, if you’re hoping to take long exposure photos and blur the motion of waves, you’ll need a tripod to keep your camera as steady as possible.
Camera Settings for Beach Photography
For high-quality results, it’s important to manually adjust your camera settings, keeping in mind the type of beach pictures you want to take.
The three main settings that control exposure are:
Aperture
This controls how wide the lens opens up and, therefore, how much light it lets in. The aperture also determines the depth of field. A wide aperture (for example, f/1.4) creates a shallow depth of field, keeping the foreground in focus and blurring out everything else. This is perfect for portrait shots with a “bokeh” background. For landscape photography, use a narrow aperture, such as f/16, to keep every element of the photo in focus.
Shutter Speed
This controls how long the shutter stays open. Fast shutter speeds (for example, 1/60th of a second) can freeze motion and produce sharp images. They’re great for fast-moving subjects, such as beach volleyball players, surfers or waves hitting the shore. Slow shutter speeds (1/4 of a second or longer) tend to blur motion and give photos an ethereal quality. This is perfect if you want to blur the motion of waves. Keep in mind that with a slow shutter, the lens stays open for longer and, therefore, lets in more light, so you’ll likely need to use an ND filter to avoid an overexposed image.
ISO
This is your camera's sensitivity to light. As a general rule, keep this as low as possible to avoid introducing too much grain into your images.
Beach Photography Ideas
Beaches act as a beautiful backdrop for just about any kind of photography, and can be turned into stunning, personal wall art for your home. Check out the following examples for inspiration:
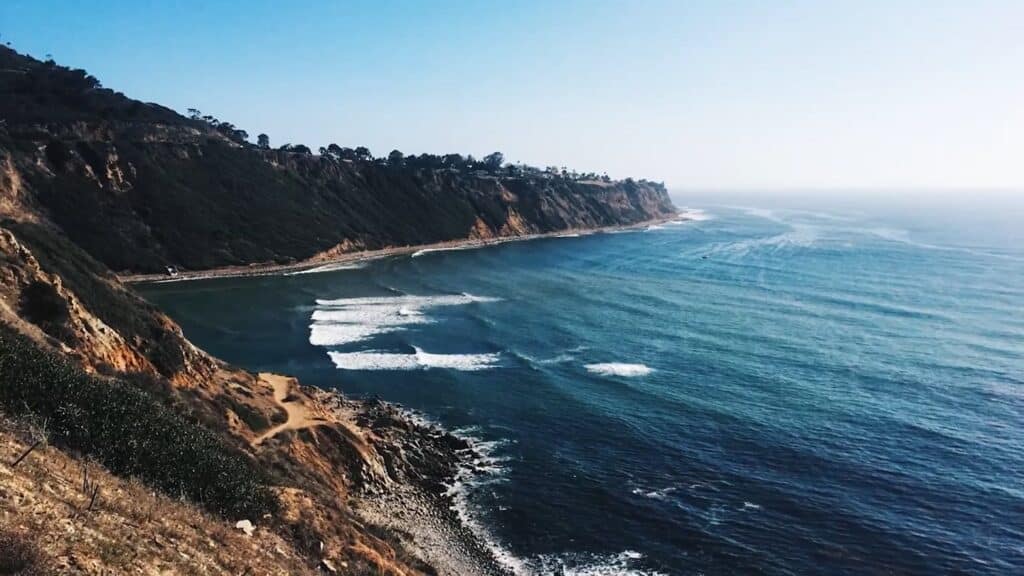
Landscape Beach Photography
Put the natural beauty of the beach in the spotlight by taking landscape photos.
Portrait Photography on the Beach
Capture some fun in the salt and surf, or commemorate a trip to your favorite beach house with family beach portraits. These are perfect for casual shoots, or even more elegant affairs such as engagement or wedding photos.

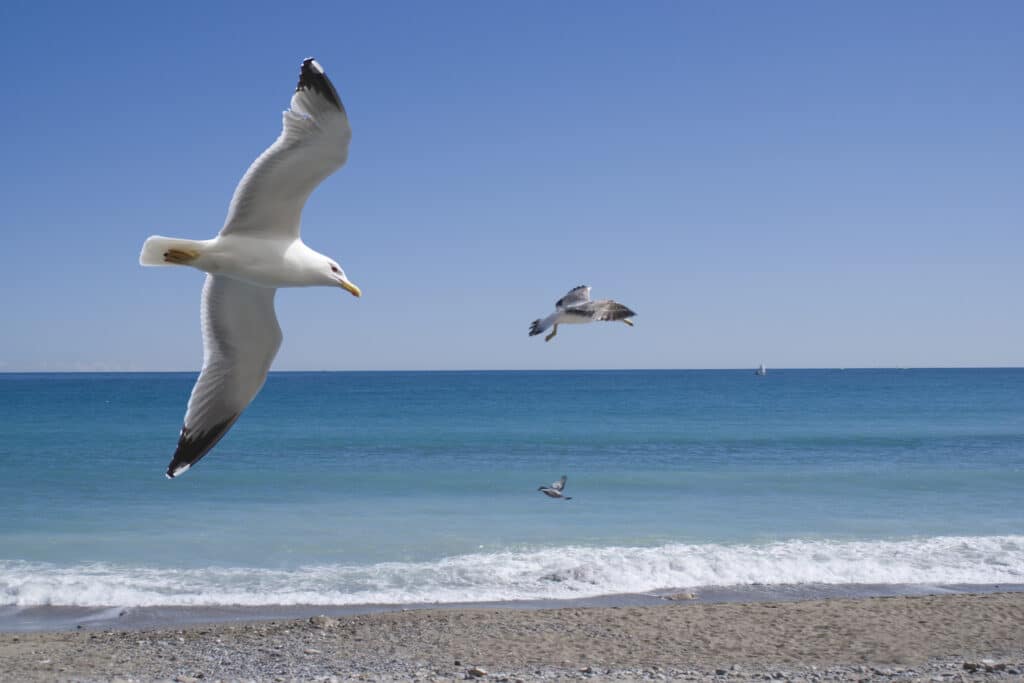
Wildlife Beach Photography
If you live in an area with lots of beach wildlife—birds, turtles or crabs, for example—why not try some wildlife photography? Just be sure not to disturb your subjects.
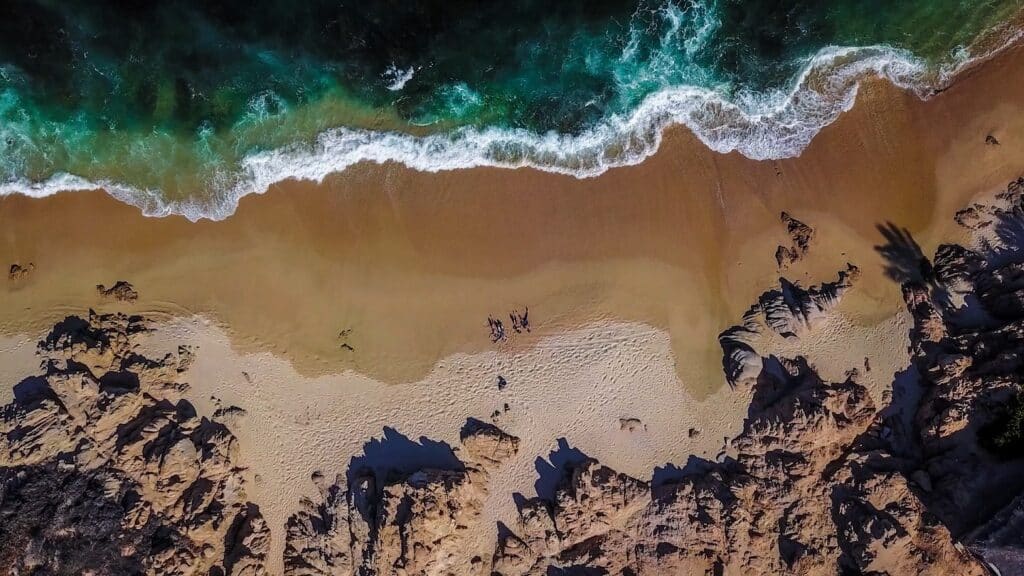
Aerial Beach Photography
If you have access to a drone, you can capture some incredible seascape photos from above. It’s a stunning perspective we almost never get to see.
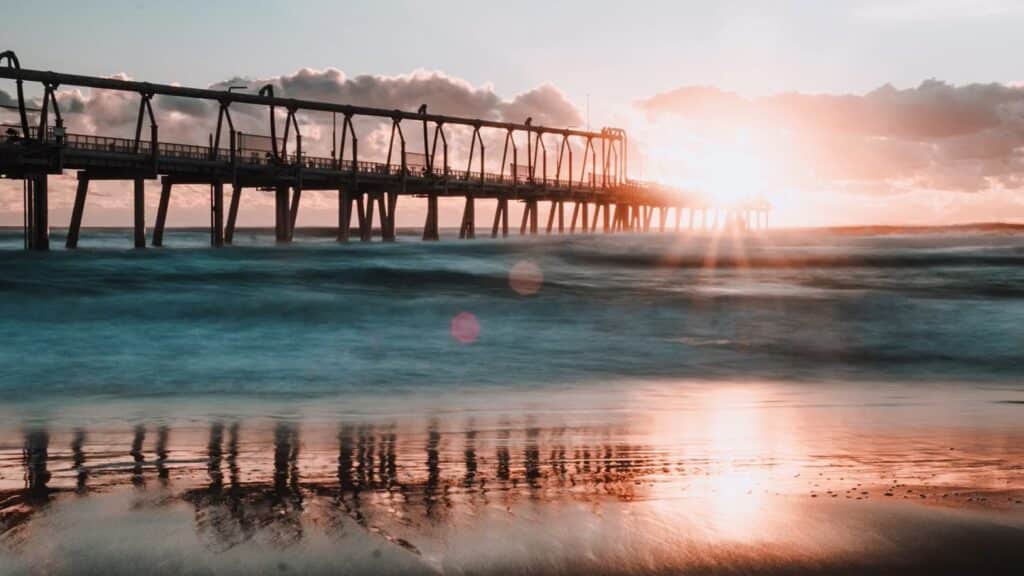
Sunrise and Sunset Beach Photography
One of the best times to take photos at the beach is at sunrise or sunset. Not only is this lighting the easiest to work with, but it results in the most gorgeous photos and makes any subject look amazing.
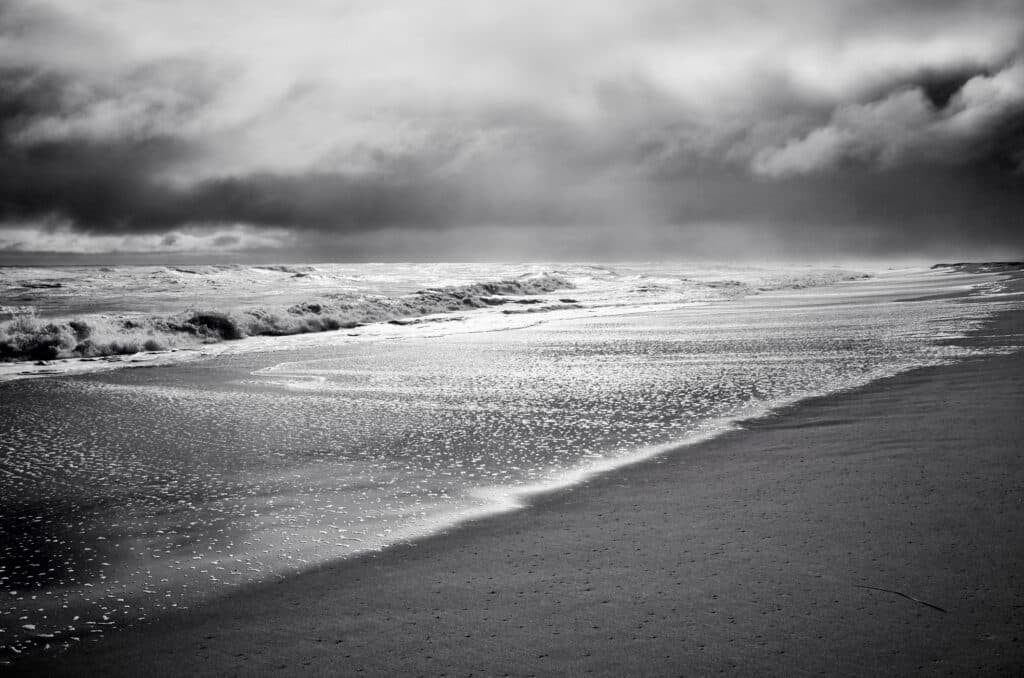
Black and White Beach Photography
Looking to add some drama or a moody atmosphere to your beach shots? Try them in black and white.
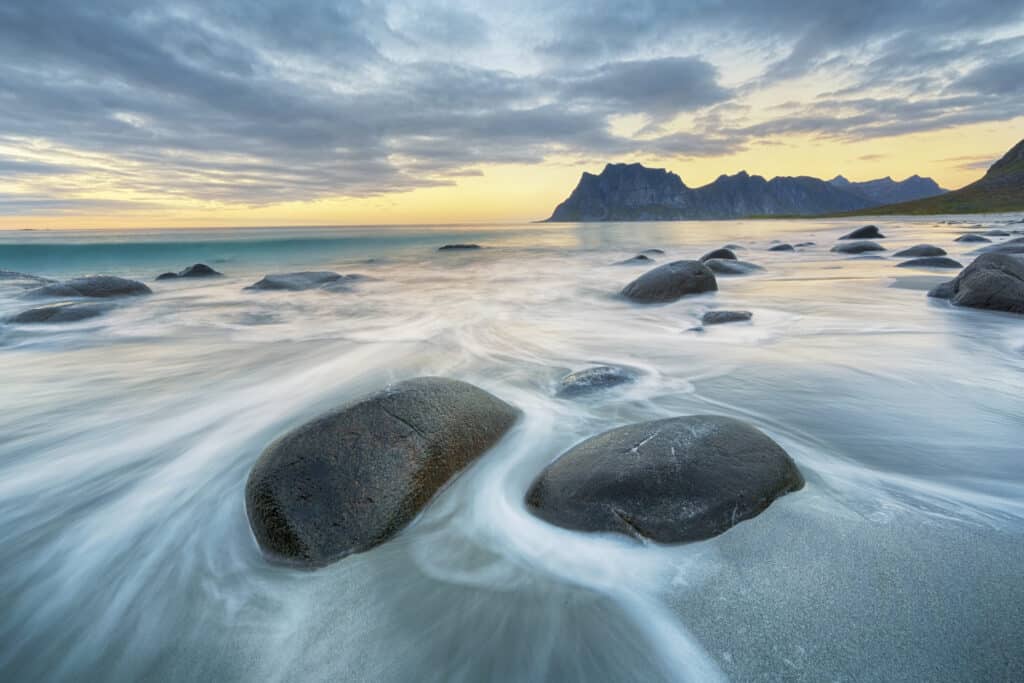
Long Exposure Beach Photography
Set your camera on a tripod and switch to a very slow shutter speed to capture the motion of water over time. This will blur the movement and give your beach photos an otherworldly quality!
Beach Photography Tips
Try out these tips to make sure you end up with perfect beach photos every time.
- Think About Composition
Every photo should have a focal point or something to draw in the viewer’s eye. For landscape photos, see if you can find something—a cliff, a branch or a large rock—to focus on. And don’t forget the rule of thirds: divide your field of view into a 3x3 grid using two horizontal and two vertical lines and make sure your object of focus is at one of the intersection points.
- Get Your Feet Wet
Don’t be afraid to get in the water if that will offer a unique perspective or better composition. Just make sure your camera is water-resistant.
- Don’t Shoot in the Middle of the Day
The sun can be quite harsh when it’s high up in the sky on a bright, clear day. For softer, more flattering lighting, go out in the morning or evening. Better yet, try to catch the golden hour just before sunset or right after sunrise.
- Shoot in the Off-season
Beaches tend to get quite busy with visitors. To keep your backgrounds clear, try our a photography session during the off-season when there are fewer people around.
- Keep Your Gear Clean
Spending time at the beach means everything you bring will likely get covered in sand. Protect your gear—especially your camera and lenses—by keeping it in a weather-resistant bag and cleaning it after every shoot.
- Shoot in RAW
Even when you choose all the right camera settings and use the right filters, you’ll probably still need to do a bit of editing. Shooting in RAW will give you lots of flexibility to correct things like exposure and help your photos look their best. Use apps such as Lightroom and Photoshop to make elements pop in post-processing.
- Try Bracketing Exposures
Getting the right exposure can be a challenge even for the most experienced photographers. When it seems impossible, try taking multiple photos, each time focusing on correctly exposing different elements of your composition. Then, simply combine the best parts of each photo in post-production.
Let’s Go to the Beach!
The best way to learn beach photography is to practice it as much as you can. So, keeping these tips in mind, head to your nearest beach and see what beauty you can capture!
Related Reading
Sayana Lam
Sayana is a musician, writer and graphic designer based in Toronto, Canada.
Learn Photography with Skillshare — Start Your 7-Day Free Trial Now!
Start Your Free Trial Today!- Unlimited access to all classes
- Hands-on classes with pro photographers
- Learn offline with Skillshare's app


